Deploy a Symfony Flex project on Heroku
Last modified: 2018-08-27 09:56
Note: This article is translation of another article I wrote on the AFSY website, originally in French, that was published when they organized an Advent calendar with various other cool PHP/Symfony developers!
We will talk about three subjects here:
- What is Flex?
- Heroku, what’s that?
- Let’s create our project and deploy it!
What is Flex?
Flex, also called Symfony Flex, is a Composer plugin you can install in any PHP project, and that will allow you to get a standardized structure and composition workflow.
Other articles might exist about Flex, especially on Fabien Potencier’s blog, so we won’t dig to deep in this.
In a few words we can tell that Flex:
- Allows to use some aliases to install one or multiple packages (like
cliforsymfony/consoleorormfor many packages related to Doctrine ORM). - Allows automatization of default package configuration installation via
recipesthat can be defined in the public repositories symfony/recipes-contrib and symfony/recipes - Thanks to the new Symfony 4 & Flex structure, totally standardizes the structure of a PHP project and enforces the use of environment variables and automated Composer scripts.
Heroku, what’s that?
It is a platform that we can use for cloud computing purposes.
We can use it to host databases, applications (web, workers, etc.) and orchestrate all of them.
Its configuration can be handled via a command-line application or an online dashboard, both very accessible.
Pricing
Heroku is not entirely free: there is a free plan available until a certain number hours of use that renews every month. In the case of a web application, it enters in a “sleeping” state after 30 minutes of inactivity, saving remaining free time. The free plan is therefore very useful for prototypes or CI environments.
For the rest, the price depends on the performances you want, add-ons you use, and mostly the amount of time apps are run.
For example, the Hobby plan is $7 per month, but it will cost you only $3.50 if you use it 15 days and stop it
afterwards. This is really important to know, because the bill will be calculated based on the uptime of each of your
Dynos (we’ll talk about this later).
A Heroku server
Heroku machines use a Linux distribution named Cedar, based on Ubuntu, and we can configure an application to use Cedar 14.04 or Cedar 16.04 (the last Ubuntu LTS branches).
Applications are executed in Linux containers called Dynos.
There are three types of Dynos: web, worker and one-off, and they are all configured by a single file named
Procfile.
webdynos are executed in a persistent way, configured by yourProcfile, and they are the only ones to be able to receive HTTP requests sent to your application. You can have only one singlewebdyno at a time.workerdynos are scripts you configure in yourProcfileand are mostly used as background tasks, like queues.one-offdynos are temporary dynos created, for example, when manually executing scripts with theheroku run {script...}command. They are also used when deploying a new release, and by theHeroku Scheduleraddon, used to manage background tasks (similarly tocrontab, check the example at the bottom of this article if you need).
Whatever script you have in your Procfile, it will always be executed in a Dyno.
Customize our server
As a user, we do not have access to the distribution. We then cannot modify the machine’s packages.
However, Heroku uses a system buildpacks that can execute commands in the machine to install some packages.
Buildpacks
Buildpacks include a set of scripts having various responsibilities:
- Detect your application “type” (Ruby, PHP, Javascript, etc.).
- Compile your application by executing scripts (install dependencies, etc.).
- Update your Heroku configuration after installation, like install add-ons or change the default script to execute on a dyno (they mostly provide entrypoints for this).
For example, the PHP buildpack is automatically detected if a composer.json file is present at the root of your
project.
It is also capable of installing PHP extensions if they are specified in the require section of your composer.json
file, like "require": { "ext-intl": "*" } for instance.
Buildpacks are essential to a base application configuration. Unless you just execute bash scripts…
Add-ons
Add-ons are usually used to integrate your project with external services, like databases, log reports, profiling, email sender…
Most add-ons offer a free plan with limited performances, but perfectly suitable for small projects.
They have several advantages:
- They are capable of adding environment vars to your config so you can use them in your project.
- They detach the application and services, like putting the database in an external server, easing maintenance and saving us from outsourcing all the stack ourselves.
- And, like other cloud computing services (like SensioCloud), this works like a charm with the last good practices of Symfony that recommend using environment vars.
Most of the time, you will need add-ons, at least for database and sending e-mails, and the free plan will be fairly enough for simple projects needing few resources
Create a Symfony 4 project with Flex
Now that we know what are the tools we are going to use, let’s use them!
First, let’s create the project somewhere on our machine:
$ composer create-project symfony/skeleton:^4.0 my_project
The symfony/skeleton package contains one single thing: a composer.json file, requiring some packages to create a
project with Symfony, such as Flex.
Main dependencies that ease everything are the following:
symfony/flex: the Composer plugin we were talking about in the beginning of this article.symfony/framework-bundle: The main package that is used to create a Symfony project.symfony/lts: A simple Composer package allowing us to define which major Symfony version we’ll use. This package simply defines conflicts with the next major version, avoiding using incompatible packages.
The big advantage is that the symfony/framework-bundle package has a Flex recipe
that will initialize nice tools in our project:
- Default framework configuration in the
config/directory. - A web front-controller in the
public/directory. - A pre-configured micro-kernel in
src/Kernel.php. - Environment set in
.envand.env.distfiles to set up our project’s main configuration. - An already working
.gitignore. - Composer scripts to clear the cache and install assets on every
composer install/updatecall.
Given that symfony/console is a base dependency of the symfony/skeleton package, Flex will also install
the symfony/console recipe and add the
bin/console file we use to know for our Symfony projects.
All these actions are defined in the different recipes of the installed packages, and the advantage is that, thanks to Flex, if we delete a package, all that have been installed by the recipe will be removed too! No more need to bother about removing bundles or config files.
Create a git environment
This is mandatory for every project!
$ git init
We will use it later, but at least we set up the field to work with Git.
Install Symfony native web server
To test our project, no need for a Nginx or Apache configuration! Like before, Symfony has the WebServerBundle so we
can test our project using native PHP 5.4 built-in server in development. But it’s not shipped by default, let’s install
it:
$ composer require --dev server
server is simply an alias of symfony/web-server-bundle, thanks Flex again!
Create a default controller
This controller is mandatory, because there is no more default controller in Symfony.
<?php

// src/Controller/DefaultController.php

namespace App\Controller;

use Symfony\Component\HttpFoundation\Response;
use Symfony\Component\Routing\Annotation\Route;

class DefaultController
{
    /**
     * @Route("/", name="homepage")
     */
    public function index(): Response
    {
        return new Response('It works! ☺');
    }
}
Of course, we are using annotations, so we need them:
$ composer require annotations
This will install packages and bundles that are necessary to use annotations, especially Routing ones.
Test this configuration
Let’s execute the command from WebServerBundle to see our website:
$ php bin/console server:run

 [OK] Server listening on http://127.0.0.1:8000


 // Quit the server with CONTROL-C.
This should give something like this:
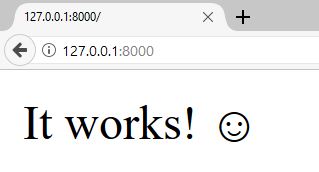
Great! It works, so we can say that we have an operational Symfony project!
Install Heroku command-line
Now we will start working on deployment with Heroku.
First, we need to install the CLI tool provided by Heroku: https://devcenter.heroku.com/articles/heroku-cli#download-and-install
Once installed, we can run it to check it works:
$ heroku --version
heroku-cli/6.14.36-15f8a25 (linux-x64) node-v8.7.0
Login with Heroku
Obviously, you should first create an account onHeroku, and once done, you have to log in with the CLI tool:
$ heroku login
Enter your Heroku credentials:
Email: me@domain.com
Password: *************█
Logged in as me@domain.com
This will help Heroku CLI to give us all details about our projects, their configuration, etc.
Starting from now, all heroku commands will be executed at the root of our project.
Create the project on Heroku
Heroku lets us do everything from the command-line, like creating a project:
$ heroku create
Creating app... done, stark-escarpment-87840
https://stark-escarpment-87840.herokuapp.com/ | https://git.heroku.com/stark-escarpment-87840.git
This gives us the final URL of the project (using the herokuapp.com domain) and the final URL of the git remote to
use.
Install the buildpack
We will install the PHP buildpack to automatize what we need:
$ heroku buildpacks:set heroku/php
Buildpack set. Next release on stark-escarpment-87840 will use heroku/php.
Run git push heroku master to create a new release using this buildpack.
Heroku proposes us to deploy a new release, but we will do this later, when the project is ready ☺.
Add Heroku branch as a remote
The goal is to deploy with a simple git push.
And the url was just given above by Heroku, let’s add it:
$ git remote add heroku https://git.heroku.com/stark-escarpment-87840.git
Note: naming the remote heroku allows Heroku CLI to automatically detect which project will be managed. Else, we
would have to set it as a command-line option on every call.
Reach production
To open the URL of your project, we can simply call:
$ heroku open
We should see something like this:
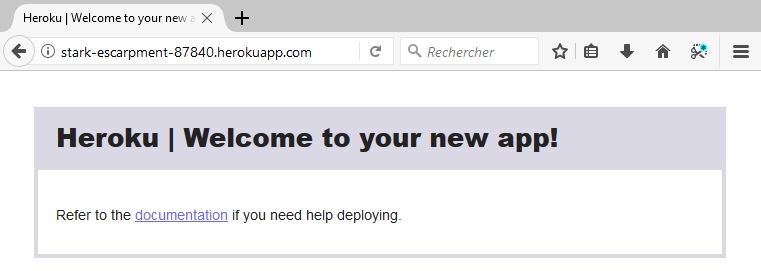
Obviously, there’s nothing yet, because we didn’t deploy. But at least, Heroku heard our demands.
Add environment vars
First, we need to add environment vars Symfony told us to specify.
All references are in .env.dist, and each time we add a new var there, we have to add it on Heroku too, manually.
For now, only 2 vars are needed:
$ heroku config:set APP_ENV=prod APP_SECRET=Wh4t3v3r
Prepare the project for it to be compatible with Heroku
First, we need to configure Nginx.
Create an Nginx configuration
Like any web application, we need a web server. Lucky we are: the PHP buildpack allow us to directly use Apache or Nginx!
Let’s create a heroku/nginx_host.conf and put this in it:
# Try to serve file directly, fallback to rewrite.
location / {
    try_files $uri @rewriteapp;
}

# Rewrite all to index.php. This will trigger next location.
location @rewriteapp {
    rewrite ^(.*)$ /index.php/$1 last;
}

# Redirect everything to Heroku.
# In development, replace this with your php-fpm/php-cgi proxy.
location ~ ^/index\.php(/|$) {
    try_files @heroku-fcgi @heroku-fcgi;
    internal;
}

# Return 404 for all other php files not matching the front controller.
# This prevents access to other php files you don't want to be accessible.
location ~ \.php$ {
    return 404;
}
This config does many things:
- Delivers the request file, if it exists.
- Else, proxy the whole request to
index.phpwhich will be delegated to the FCGI provider configured by Heroku (which is aphp-fpmprocess, in our case). - If another PHP fiel than
index.phpis asked by the client, we send a 404. This prevents any “vendor-like” php file to be executed or displayed.
Create a Procfile.
The Procfile is a file that describes all the different Dynos our project will use.
Each dyno will count in the spent time for the current plan, so be careful: do not create dynos that will not be used often. For cron tasks, you have the Scheduler (see later).
Here, we only have one special dyno: web.
Each line contains two informations: the dyno name, that must be unique, and the script to execute.
web is the only special name, it is the only one receiving HTTP requests.
The script will be the one provided by the PHP buildpack, an nginx process followed by the web entry point directory.
We also have to inject the nginx configuration we wrote above, mandatory to use Symfony (else, only the homepage will show!).
web: vendor/bin/heroku-php-nginx -C heroku/nginx_host.conf public/
It’s enough for Heroku to execute our code.
You can also customize nginx and php-fpm configuration, and even completely override the whole nginx config (and not
just the vhost like we did), but it’s just about another option to specify in the Procfile, and we don’t need it yet.
In case you need it, Heroku’s documentation will be of a good help to customize your nginx instance.
Deploy the project on Heroku
Let’s deploy!
$ git add .
$ git commit -m "Initial files"
$ git push heroku master
(...)
remote: Compressing source files... done.
remote: Building source:
remote:
remote: -----> PHP app detected
remote: -----> Bootstrapping...
remote: -----> Installing platform packages...
remote:        - php (7.1.11)
remote:        - nginx (1.8.1)
remote:        - apache (2.4.29)
remote: -----> Installing dependencies...
remote:        Composer version 1.5.2 2017-09-11 16:59:25
remote:        Loading composer repositories with package information
remote:        Installing dependencies from lock file
remote:        Package operations: 40 installs, 0 updates, 0 removals
remote:        (...)
remote:        Generating optimized autoload files
remote:        (...)
remote:        Executing script cache:clear [OK]
remote:        Executing script assets:install --symlink --relative public [OK]
remote:
remote: -----> Preparing runtime environment...
remote: -----> Checking for additional extensions to install...
remote: -----> Discovering process types
remote:        Procfile declares types -> web
remote:
remote: -----> Compressing...
remote:        Done: 16.7M
remote: -----> Launching...
remote:        Released v13
remote:        https://stark-escarpment-87840.herokuapp.com/ deployed to Heroku
remote:
remote: Verifying deploy... done.
To https://git.heroku.com/stark-escarpment-87840.git
Project is now deployed, let’s open it:
$ heroku open
We should see this:
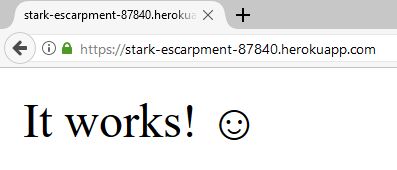
Now that the project is installed, we won’t stop here, won’t we?
Our projects are much more complex than a single PHP file, so let’s continue.
Install a database
Prepare the project
First, install the Doctrine ORM:
$ composer require orm-pack
Using version ^1.0 for symfony/orm-pack
(...)
Symfony operations: 3 recipes (7d946f30d2601a4530d4c10790aefad1)
  - Configuring doctrine/doctrine-cache-bundle (1.3.2): From auto-generated recipe
  - Configuring doctrine/doctrine-bundle (1.6): From github.com/symfony/recipes:master
  - Configuring doctrine/doctrine-migrations-bundle (1.2): From github.com/symfony/recipes:master
(...)
The different Flex recipes will configure this:
DoctrineBundle:- Adds the
DATABASE_URLenvironment var to our.envfile. - Default bundle configuration, using this var.
- Adds the
DoctrineMigrationsBundle:- Bundle configuration, and automatically discovered migrations in
src/Migrations.
- Bundle configuration, and automatically discovered migrations in
We’ll talk later about migrations.
Prepare Heroku database
We now need to install a database in Heroku, and we’ll use an add-on for this:
$ heroku addons:create heroku-postgresql:hobby-dev
Creating heroku-postgresql:hobby-dev on stark-escarpment-87840... free
Database has been created and is available
 ! This database is empty. If upgrading, you can transfer
 ! data from another database with pg:copy
Created postgresql-flexible-83322 as DATABASE_URL
Use heroku addons:docs heroku-postgresql to view documentation
Heroku will use another server (that we won’t care about) to manage the database, which eases managing and migrating, making backups, etc., while keeping our app in its own place.
Note: I’m using PostgreSQL here because Heroku recommends it and it has nice stuff regarding pgsql, but you can also
use other add-ons for MySQL or MariaDB, like ClearDB or JawsDB providers, which are also external cloud services and can
be integrated to Heroku just as heroku-postgresql.
We then must update our .env and .env.dist file locally to change the PDO driver from mysq (used by default in
the ORM) to pgsql.
Since the env var is already added to Heroku, we can check it in case of:
$ heroku config
=== stark-escarpment-87840 Config Vars
APP_ENV:      prod
APP_SECRET:   Wh4t3v3r
DATABASE_URL: postgres://...  <--- This var was just added by heroku-postgresql add-on.
Note: The presented addons for MySQL and MariaDB can have an environment var with a different name. Feel free to
change your .env files and your Doctrine or Heroku config, to use it.
We now just have to create our entities like we are used to!
However, for the schema, it’s a good practice to use migrations.
Talking about migrations, how to execute them on Heroku?
Customize deployment scripts
Before talking about migrations, let’s first see how to customize our deploys.
Heroku checks uses buildpacks to determine what commands to execute when we create a new release.
As our project is mostly a PHP project, the PHP buildpack detects the presence of a script in the scripts section of
our composer.json file: compile.
This script is executed when deploying, via composer run compile.
The advantage is that if this script fails with an exit code different than zero, the deployment is canceled!
We can therefore put our migrations there.
Create our migration
Let’s create our database and the first necessary migration.
$ php bin/console doctrine:database:create
$ php bin/console doctrine:migrations:diff
Note: This command works only if you have an empty database.
If you want to be sure the generated migration is correct, you can execute these commands, just in case:
$ php bin/console doctrine:database:drop --force
$ php bin/console doctrine:database:create
$ php bin/console doctrine:migrations:diff
Otherwise, create a migration with the doctrine:migrations:generate command, copy a dump of your database and
copy/paste it directly in the generated migration file.
Once you’ve done that, you should have something like this:
<?php declare(strict_types = 1);

namespace DoctrineMigrations;

use Doctrine\DBAL\Migrations\AbstractMigration;
use Doctrine\DBAL\Schema\Schema;

/**
 * Auto-generated Migration: Please modify to your needs!
 */
class Version20171106100053 extends AbstractMigration
{
    public function up(Schema $schema)
    {
        // this up() migration is auto-generated, please modify it to your needs
        $this->abortIf($this->connection->getDatabasePlatform()->getName() !== 'postgresql', 'Migration can only be executed safely on \'postgresql\'.');

        $this->addSql('CREATE SEQUENCE Post_id_seq INCREMENT BY 1 MINVALUE 1 START 1');
        $this->addSql('CREATE TABLE Post (id INT NOT NULL, title VARCHAR(255) NOT NULL, content TEXT NOT NULL, PRIMARY KEY(id))');
    }

    public function down(Schema $schema)
    {
        // this down() migration is auto-generated, please modify it to your needs
        $this->abortIf($this->connection->getDatabasePlatform()->getName() !== 'postgresql', 'Migration can only be executed safely on \'postgresql\'.');

        $this->addSql('CREATE SCHEMA public');
        $this->addSql('DROP SEQUENCE Post_id_seq CASCADE');
        $this->addSql('DROP TABLE Post');
    }
}
If your migration looks like this, let’s continue!
Add migrations to our deployment workflow
To execute our migrations, we need one single command:
$ php bin/console doctrine:migrations:migrate

                    Application Migrations


WARNING! You are about to execute a database migration that could result in schema changes and data lost. Are you sure you wish to continue? (y/n)y
Migrating up to 20171106100053 from 0

  ++ migrating 20171106100053

     -> CREATE SEQUENCE Post_id_seq INCREMENT BY 1 MINVALUE 1 START 1
     -> CREATE TABLE Post (id INT NOT NULL, title VARCHAR(255) NOT NULL, content TEXT NOT NULL, PRIMARY KEY(id))

  ++ migrated (2.7s)

  ------------------------

  ++ finished in 2.7s
  ++ 1 migrations executed
  ++ 2 sql queries
When executing this locally, everything works. Now we must execute it on production, and only when deploying.
We then will add a Composer script: the one the PHP buildpack executes at deploy time (see above).
{
    "scripts": {
        "compile": [
            "php bin/console doctrine:migrations:migrate"
        ]
    }
}
That’s all!
On every deploy, this command will be executed in the application context. And as the context inherits from all
environment vars, we do not even need to add --env=prod like we did during the old days.
And now, let’s deploy again:
$ git add . && git commit -m "Setup migrations"
$ git push heroku master
(...)
remote: -----> Running 'composer compile'...
remote:        > php bin/console doctrine:migrations:migrate
remote:
remote:                            Application Migrations
remote:
remote:
remote:        Migrating up to 20171106100053 from 0
remote:
remote:          ++ migrating 20171106100053
remote:
remote:             -> CREATE SEQUENCE Post_id_seq INCREMENT BY 1 MINVALUE 1 START 1
remote:             -> CREATE TABLE Post (id INT NOT NULL, title VARCHAR(255) NOT NULL, content TEXT NOT NULL, PRIMARY KEY(id))
remote:
remote:          ++ migrated (0.06s)
remote:
remote:          ------------------------
remote:
remote:          ++ finished in 0.06s
remote:          ++ 1 migrations executed
remote:          ++ 2 sql queries
(...)
Migrations have been executed on the production database managed by Heroku, everything’s ok!
Execute cron with Heroku and Symfony
First, we need a command to execute, let’s create a dummy one:
<?php

namespace App\Command;

use Symfony\Component\Console\Command\Command;
use Symfony\Component\Console\Input\InputInterface;
use Symfony\Component\Console\Output\OutputInterface;

class SimpleMessageCommand extends Command
{
    protected static $defaultName = 'app:simple-message';

    protected function configure()
    {
        $this->setDescription('Simply sends a message to stdout and stderr.');
    }

    protected function execute(InputInterface $input, OutputInterface $output)
    {
        $now = date('Y-m-d H:i:s');
        $output->writeln("[$now] Stdout message");
        fwrite(STDERR, "[$now] Stderr message");
    }
}
The goal is to check Heroku logs to see these messages.
Pro tip: Since Symfony 3.4, we can use the static property Command::$defaultName. If our command is defined as a service, this will
allow Symfony to optimize console loading and container compilation by not instantiating the command everytime.
Instal Heroku Scheduler
Heroku Scheduler is the addon that will allow us to execute tasks at regular intervals.
We’ll install it in our project:
$ heroku addons:create scheduler:standard
Creating scheduler:standard on stark-escarpment-87840... free
This add-on consumes dyno hours, which could impact your monthly bill. To learn more:
http://devcenter.heroku.com/addons_with_dyno_hour_usage

To manage scheduled jobs run:
heroku addons:open scheduler

Created scheduler-reticulated-65091
Use heroku addons:docs scheduler to view documentation
Now, let’s open this addon in the browser to customize it:
$ heroku addons:open scheduler
You should see something like this:
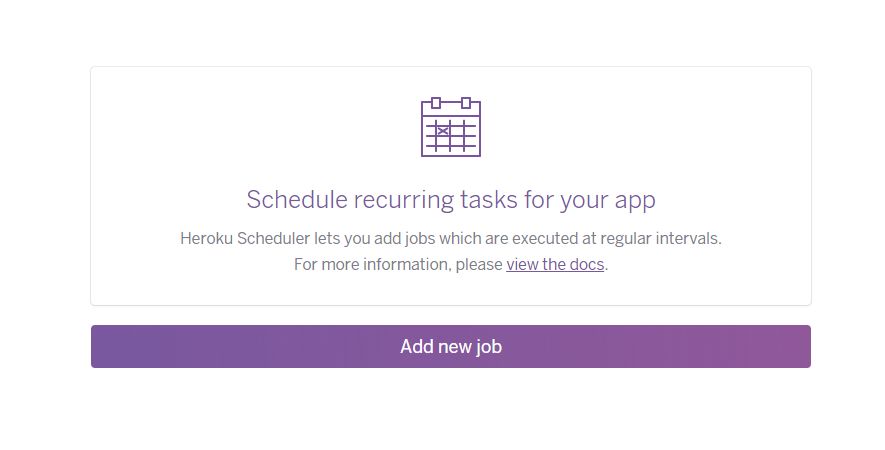
The Add new job button will help us to exactly what we need!
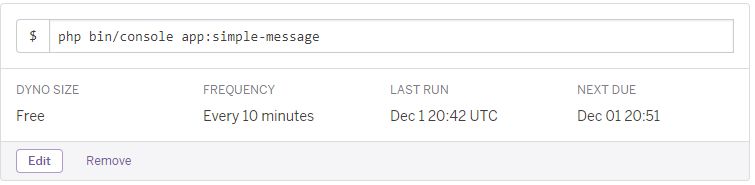
The frequency is less flexible than a real cron task, but for most simple tasks, this remains the best option.
Else, we’ll need a worker, which is more complex to setup (and more expensive).
We then can execute our task:
- Once a day, with a hour/half-past time.
- Every hour, to the dozen minutes.
- Every ten minutes after the task is created/updated.
Once your command is configured, you can wait a few minutes for it to execute.
Let’s use Heroku logs to check for this:
$ heroku logs | grep scheduler
2017-12-01T21:02:56.302995+00:00 heroku[scheduler.8108]: Starting process with command `php bin/console app:simple-message`
2017-12-01T21:02:56.979408+00:00 heroku[scheduler.8108]: State changed from starting to up
2017-12-01T21:02:58.362544+00:00 app[scheduler.8108]: [2017-12-01 21:02:58] Stdout message
2017-12-01T21:02:58.482250+00:00 app[scheduler.8108]: [2017-12-01 21:02:58] Stderr message
2017-12-01T21:02:58.486752+00:00 heroku[scheduler.8108]: Process exited with status 0
2017-12-01T21:02:58.504268+00:00 heroku[scheduler.8108]: State changed from up to complete
(Note: On Windows, you don’t have grep, so just listen to the logs without grepping, it’s fine too!)
We see our Stdout and Stderr messages!
And voilà, we have a correctly configured routine!
Note: Be careful about the execution time of your tasks, because it will count in the consumed time of your dyno, and be charged depending on your billing plan. However, a command that takes only 5 seconds, executed 144 times a day, this makes 720 seconds consumed in a month. Nothing really big compared to the approximately 2592000 secondes for a web-server running 24/7.
Improve our Heroku environment
Heroku being full of addons, and most of them having a free plan, here are my recommendations:
- Autobus, a backup system for your database, really useful and the free plan is ideal for simple projects.
- Blackfire (beta), the unavoidable PHP profiling tool!
- Mailgun, awesome mailer service, which can also be directly plugged to
Swiftmailer thanks to the
MAILER_URLenvironment var. And the free plan grants you 400 emails per day, (or approximately 12000 per month) is largely enough for most projects (the next plan being at 50000 mails per month…). - Papertrail, nice monitoring tool for logs for your dynos, very useful
to keep an eye on PHP and web-server errors. It can send you an email periodically with a digest of all errors, and you
have access to many filters, commands, etc.. The big advantage is that we don’t even have to configure Monolog with a
complex setup: we just need to redirect all logs to
php://stderr! - Deploy Hooks, a nice way to receive a small notification on Slack, IRC, email or an HTTP request on any url when the project is deployed and successfully released!
Conclusion
Heroku is a really simple PaaS tool to use, but above all, it’s awesome for testing, because we just have to use review apps for preprod, and as preprod is not always used, we can use the free plan for it!
For upload and file storage, the filesystem is temporary, so any upload is deleted after a release. No persistent mounting point is available (contrary to Platform.sh for example), but it’s really easy to setup file upload to Amazon S3, there’s even a documentation page for this, you just have to use S3 references in your code and you’re set.
For Symfony and S3, I am personally using the combo of oneup/flysystem-bundle and league/flysystem-aws-s3-v3, which
allow me to just use the League\Flysystem\FilesystemInterface service as dependency to my own services/controllers,
and it works like a charm!
At Studio Agate, we made the choice to use Heroku for our project, a big monolithic multi-domain web application that stores portals and websites related to the tabletop RPGs the studio makes, with a character manager, and an interactive cartography application.